Slay the Spire 2 — Elite Enemies Database
All 15 elites across Acts 1–3. HP values, mechanics, and strategies.
Showing 15 of 15 elites

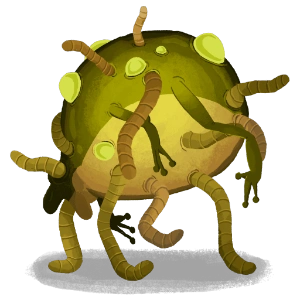
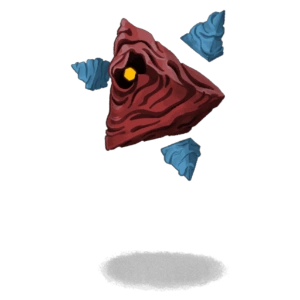
Bygone Effigy
Mechanics
Starts asleep — does nothing on turn 1. Each card played increases damage from subsequent attacks that turn (Slow effect). Rewards burst multi-attack turns.
Strategy
Use turn 1 to set up powers or draw. Follow with a large multi-attack turn to maximize the Slow effect.

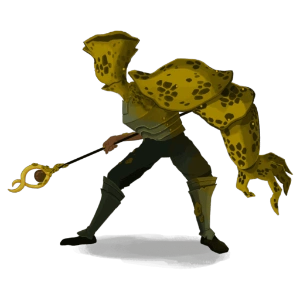
Byrdonis
Mechanics
Starts with Territorial 1. Alternates between Peck (3×3 damage) and SWOOP (16 damage). Gains Strength each turn — fights get deadlier fast.
Strategy
Kill quickly. Apply Weak to reduce damage. Burst damage is key — don't let Strength stack up.
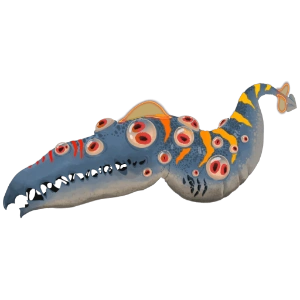
Phrog Parasite
Mechanics
Spawns Wrigglers when killed. Fight continues after main enemy dies. Adds Infection cards to your discard pile.
Strategy
Save energy and cards for the second phase. AoE damage helps. Don't exhaust all resources on the main enemy.
Phantasmal Gardener
Mechanics
Gains Block the first time it takes damage each turn. Punishes multi-hit attacks. Rewards strong single hits.
Strategy
Use strong single attacks. Avoid wasting multiple small hits early in a turn — trigger the Block first, then hit hard.

Skulking Colony
Mechanics
Hardened Shell: cannot lose more than a set amount of HP per turn. Adds Status cards to your deck. Fight always lasts multiple turns.
Strategy
Focus on consistent damage over multiple turns. Bring defense. Use card draw to manage Status clutter.
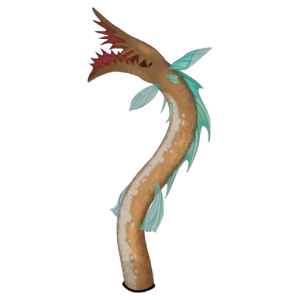
Terror Eel
Mechanics
Deals heavy damage. Becomes Stunned (loses next action) when HP drops below a threshold for the first time. Timing the stun is crucial.
Strategy
Push it below the stun threshold at the right moment. Use the free turn to deal massive damage. Block before triggering the stun.
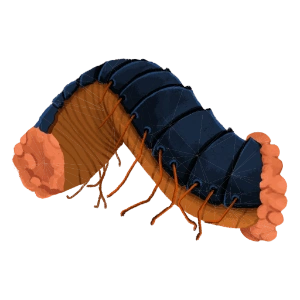
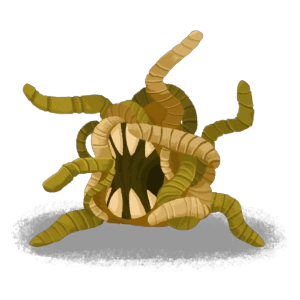
Decimillipede
Mechanics
Multi-segment enemy. Defeated segments can revive if other segments are still alive. Requires sustained focused damage.
Strategy
Focus down one segment at a time. AoE is less effective. Sustained single-target damage wins this fight.
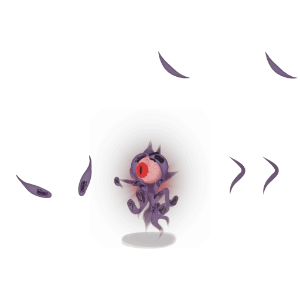
Entomancer
Mechanics
Adds Dazed cards to your deck whenever hit by an Attack card. Can quickly clog your hand with unplayable cards.
Strategy
Minimize Attack card plays — use Skills for damage when possible. Exhaust Dazed cards. Prioritize exhaust synergies.
Infested Prism
Mechanics
Vital Spark: grants 1 Energy to the attacker the first time it takes Attack damage each turn. Strong attacks and heavy HP pool.
Strategy
Use the free energy wisely — save a big card to play after triggering Vital Spark. High burst damage recommended.
Flail Knight
Mechanics
Part of the Knight Trio encounter alongside Spectral Knight and Magi Knight. Each knight has a distinct attack style.
Strategy
Requires strong AoE damage. Focus down one knight at a time. Prepare for a long multi-enemy fight.
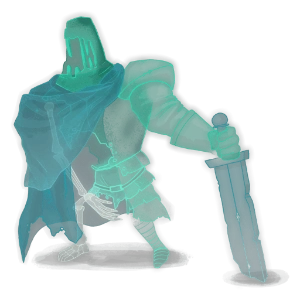
Spectral Knight
Mechanics
Part of the Knight Trio encounter. Spectral attacks that may bypass or reduce Block effectiveness.
Strategy
Part of a three-enemy fight. Prioritize the most dangerous knight first. AoE damage helps manage all three.

Magi Knight
Mechanics
Part of the Knight Trio encounter. Magical attacks that apply debuffs. Lowest HP of the three knights.
Strategy
Kill first due to lowest HP. Eliminating it reduces incoming debuffs for the rest of the fight.
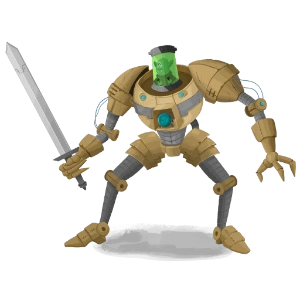
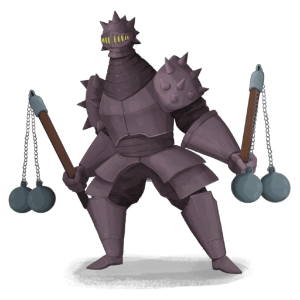
Mecha Knight
Mechanics
Starts with Artifact — blocks several debuffs. Heavily armored with powerful attacks. Highest HP of any elite.
Strategy
Debuffs are less effective. Requires very high damage output and strong defense. Only fight with a fully assembled deck.
Soul Nexus
Mechanics
Attacks while applying Weak and Vulnerable to the player. Debuffs compound — incoming damage becomes very hard to manage.
Strategy
Cleanse debuffs when possible. High block generation is essential. Kill quickly to minimize debuff stacking.
Wriggler
Mechanics
Spawned by Phrog Parasite. Uses Nasty Bite (6 damage), Wriggle (gains Strength +2, adds Infection to discard), and Spawned (Stun).
Strategy
Clean up quickly after killing Phrog Parasite. Low HP but Strength gain makes it dangerous if ignored.
About Elite Fights
Elite enemies are stronger encounters that reward a relic on defeat. Most Act 1 runs should aim to fight 1–2 elites if HP allows — early relics dramatically increase win chances. Act 3 elites are boss-level threats and should only be attempted with a fully assembled deck.
Full Elite Strategy Guide →